Documentation
All-In-One Email Marketing service.
Easily Create, Send & Analyze Your Email Marketing Campaigns.
Reach the Inbox. To automate your email campaign you first need to create an account.
How to integrate mailgun API in sendgomail
How to integrate mailgun smtp in sendgomail
How to integrate Sendgrid smtp in sendgomail
How to integrate Sendgrid API in Sendgomail
Meet Sendgomail | Simple, Powerful Email Marketing
Introduction
How to Register & Login in Sendgomail?
How to add sending servers on sendgomail ?
How to add sending domains in sendgomail?
How to create list in sendgomail?
How to add multiple subscribers in sendgomail?
How to create campaigns in sendgomail?
how to integrate sendgomail in your website?
how to do automations on sendgomail?
How to activate code in sendgomail?
How to create template in sendgomail?
How to check credits used?
How to change settings in sendgomail ?
How to resend campaigns in sendgomail?
First Things First: Register To Sendgomail
With a Sendgomail, you can do things like:
- Send unlimited email campaign
- Automate your email marketing
- Analyze your email campaigns
You need an email account to create a Sendgomail Account.
Steps – Click the link – https://sendgomail.com/
- Go to the create account page.
- Click Create account. You will scroll to the pricing section.
- Choose your plan - If you want to try our service we are offering a one month free account for 5000 subscribers with unlimited email campaigns. Once you select your plan click the “Buy Now” button
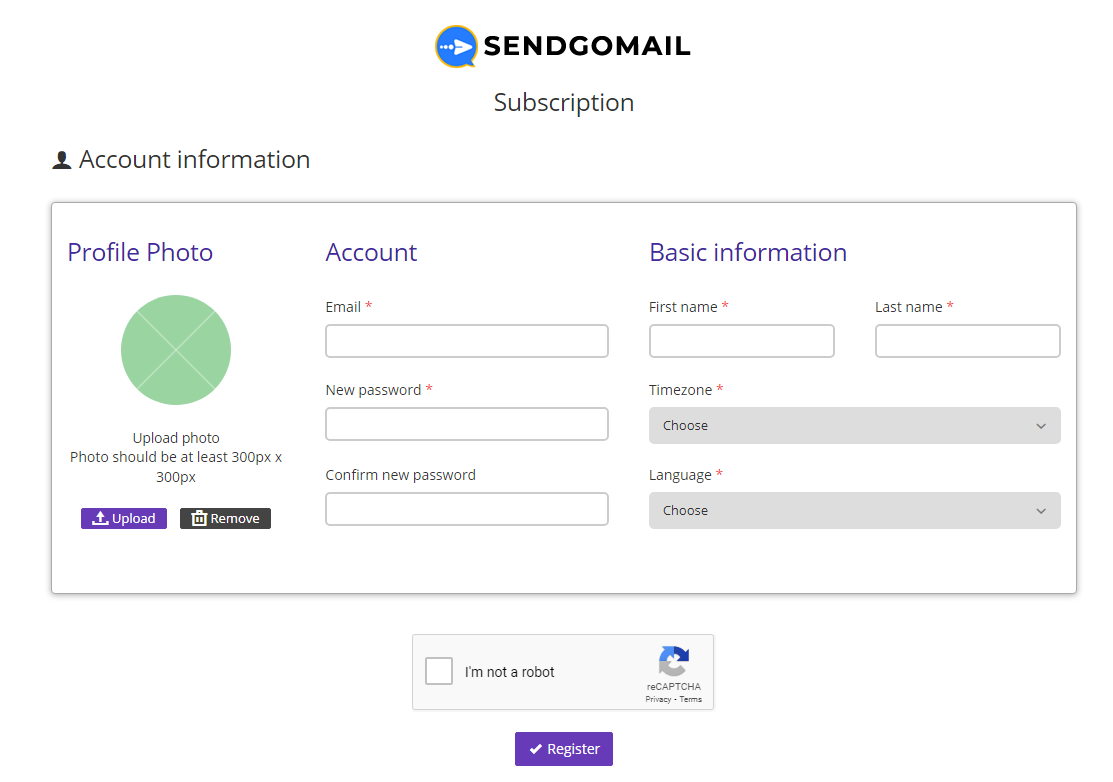
- You will be redirected to the registration page. Fill in account details.
- Enter your Email. In the Basic Information section, enter a first & last name, choose timezone and language. Enter and confirm your password.
- Optional: If you want you can add a photo or logo for your account.
- Verify captcha and then hit “Register”.
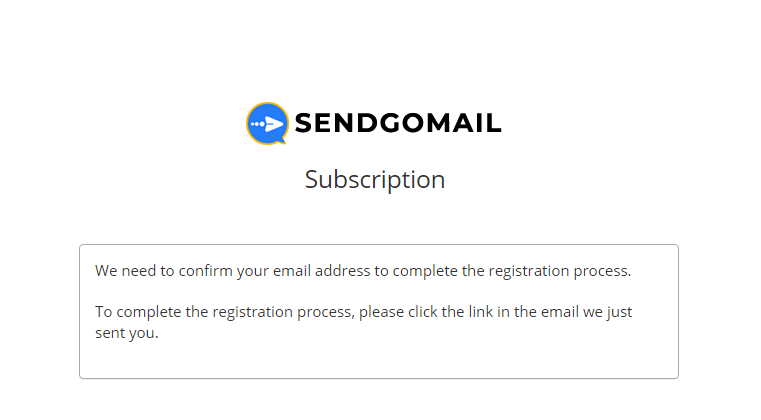
You will be redirected to the Registration confirmation Page.
To complete the registration process, please click the link in the email we sent you.
To make sure you are in the best position to be successful using Sendgomail, we initially need to verify your email address. This check is essential to guarantee optimal security.
Once you confirmed your account, you will be redirected to your Sendgomail account subscription page.
Over there you can see your subscribed plan details.
Click Get Started.
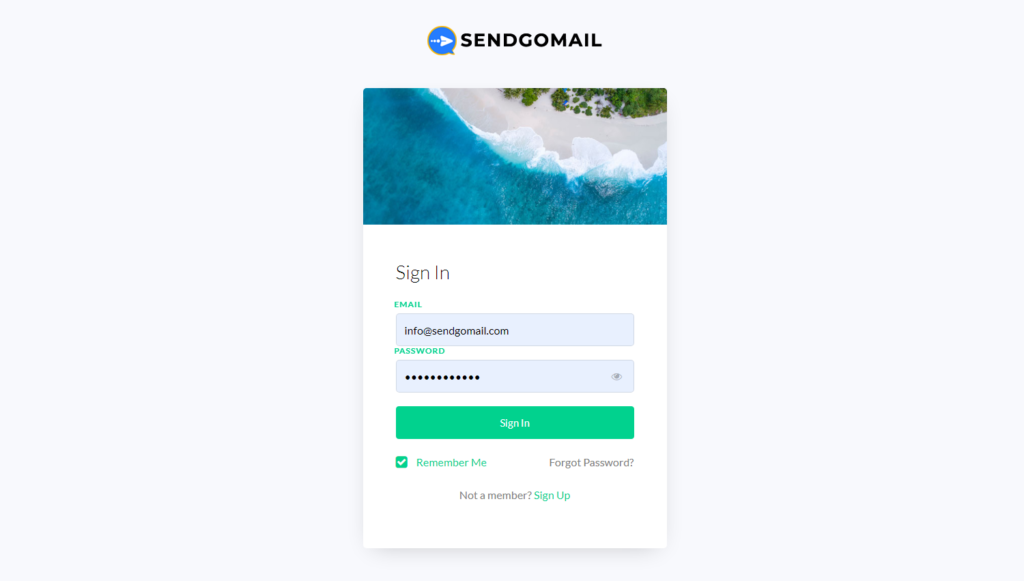
After verify email login your account
Configure Multiple SMTPs With Sendgomail
Sendgomail allows you to connect with multiple SMTP services with your Sendgomail account.
You can configure a standard SMTP connection or connect to a 3rd services like Amazon SES, SendGrid, Mailgun, ElasticEmail, SparkPost…
You can also take advantage of the hosting server’s email capability by creating a “PHP Mail” or “Sendmail” sending server.
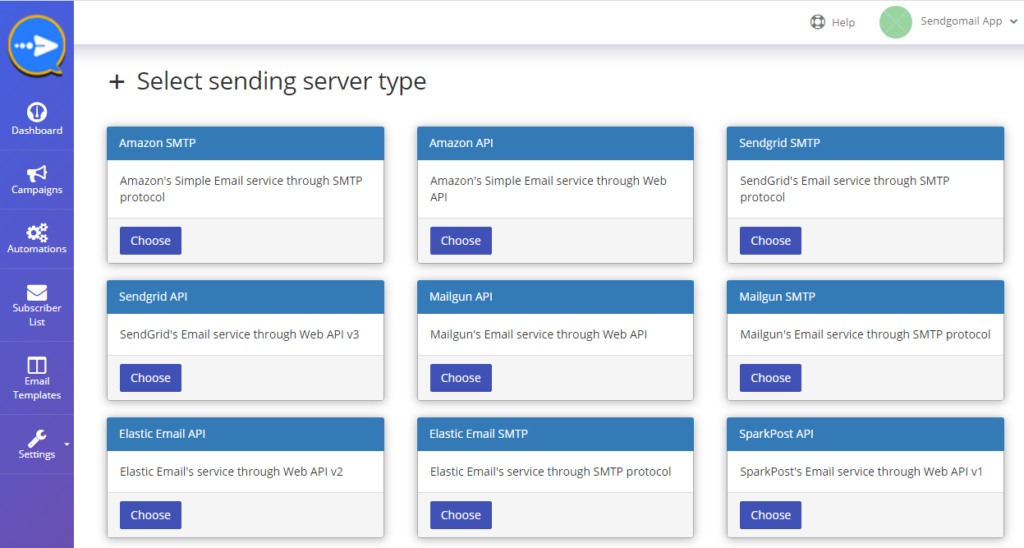
Add/Configure New SMTP –
- Step: 1 Hover your mouse on the “Sending” Option in your Sendgomail dashboard. Drop down will open, click on option “Sending Servers”
- Step: 2 Click on ADD NEW SERVER to add new SMTP.
- Step: 3 Sending server page will open - Select sending server
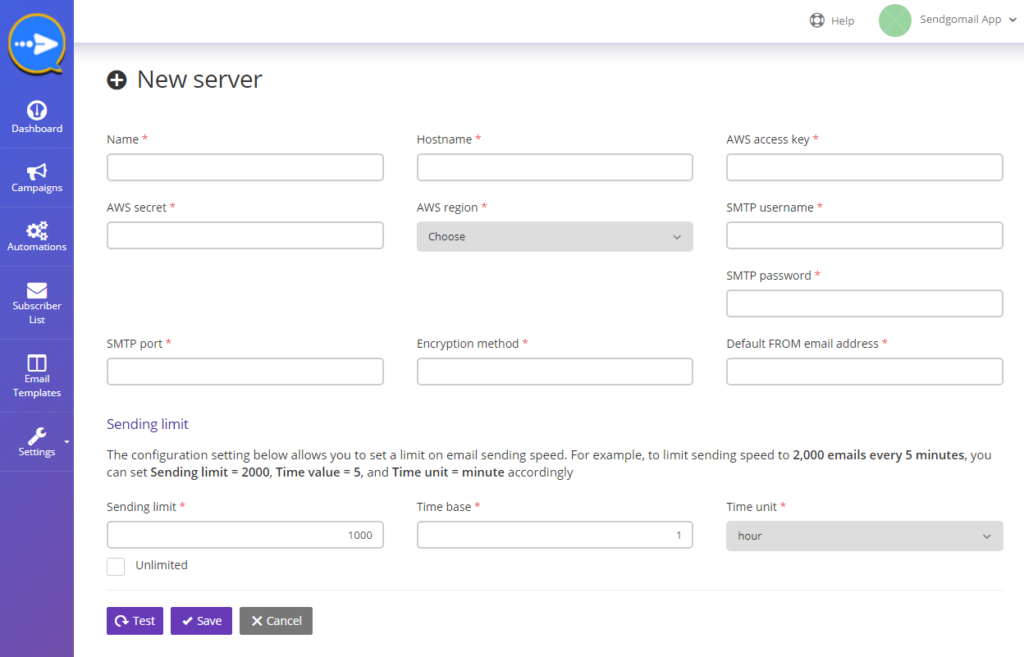
- Step: 4 A form opens to fill SMTP details provided By SMTP Service Provider
- Step: 5 click on the SAVE button to save details.
Create Contacts Lists To Send Bulk Email
Before You Start
Here are some things to know before you begin this process.
- The number of audiences you can store in your account depends on your plan.
- If you need to maintain separate audiences, you can repeat this process to create them. Audiences are independent of one another, so contact and audience data will be kept separate on a per-audience basis. Contacts who appear in multiple audiences will increase your total contact count.
Create List-
From your dashboard click “List” from the left-hand side option panel.
Click the “Create List” button present on the right hand side.
You will be redirected to Create list page where you can see the form
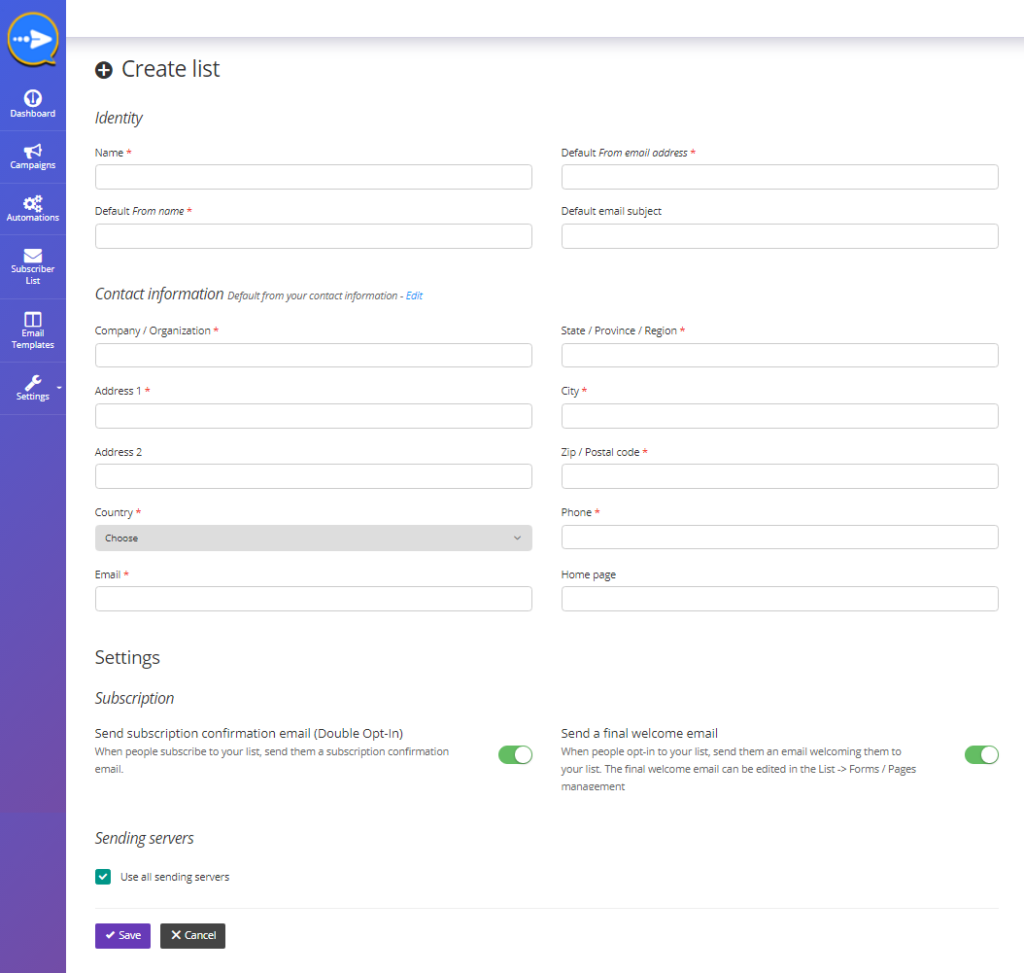
- Step 1 - Enter list name in the name input field.
- Step 2 - Enter default email address this will tell your recipient who is sending this email and you will receive a reply to that email account. If you want you can change your email id while sending your campaign.
- Step 3. Default From Name - Use something subscribers will instantly recognize, like your company name.
- Step 4. Contact Information - Enter your company address along with your website url.
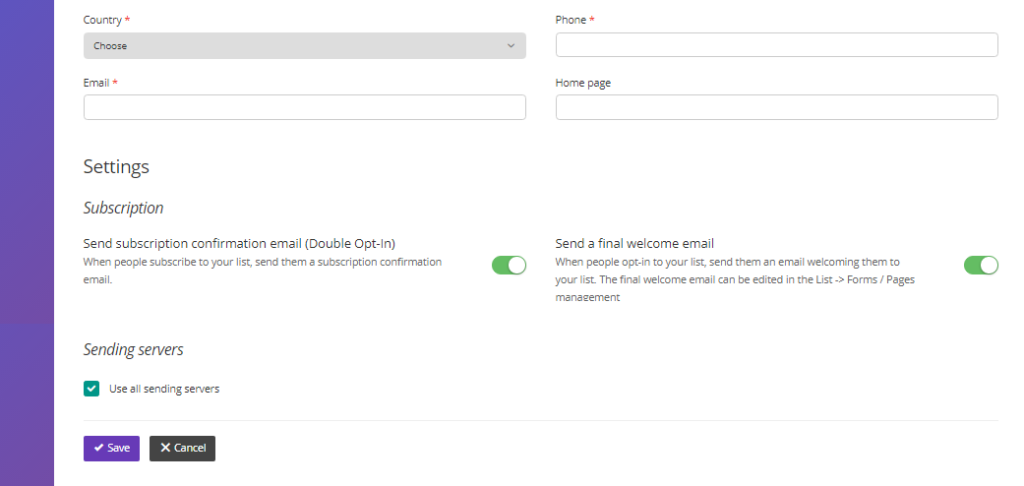
- Step 5. Settings section- On/off the option under setting section based on your preference
Subscription confirmation email
Subscription confirmation email (Double Opt-In)- When people subscribe to your list, send them a subscription confirmation email.
Unsubscribe notification- Send subscribers a final “Goodbye” email to let them know they have unsubscribed.
Welcome email- When people opt-in to your list, send them an email welcoming them to your list.
When you’re finished, click Save.
After you create your audience, you’ll be able to import contacts or set up a signup form to collect new contacts.
How To Import Subscriber’s List
For importing subscribers in your Sendgomail account, you can follow the steps given below.
But before moving forward, there is some essential piece of information which you should know while importing your subscribers.
Points To Be Considered –
- Make sure that your email list is in comma-separated value (CSV) file format.
- You could have the same email addresses in the different list, duplicate emails are removed while sending emails. So, you don’t have to worry about sending an email twice to the same email address.
Step 1- Click on the “LIST” option from the left side panel. You will be redirected to “My List” page.
Step 2- Click on the list in which you want to import subscribers.
Now, importing subscribers in your created list can be accomplished using the following options-
2.1 Import subscribers in the list through CSV file.
2.2 Add the subscribers manually to your list.
Step:2.1 – Importing subscribers through CSV file.
To add subscribers through CSV file follow the given steps –
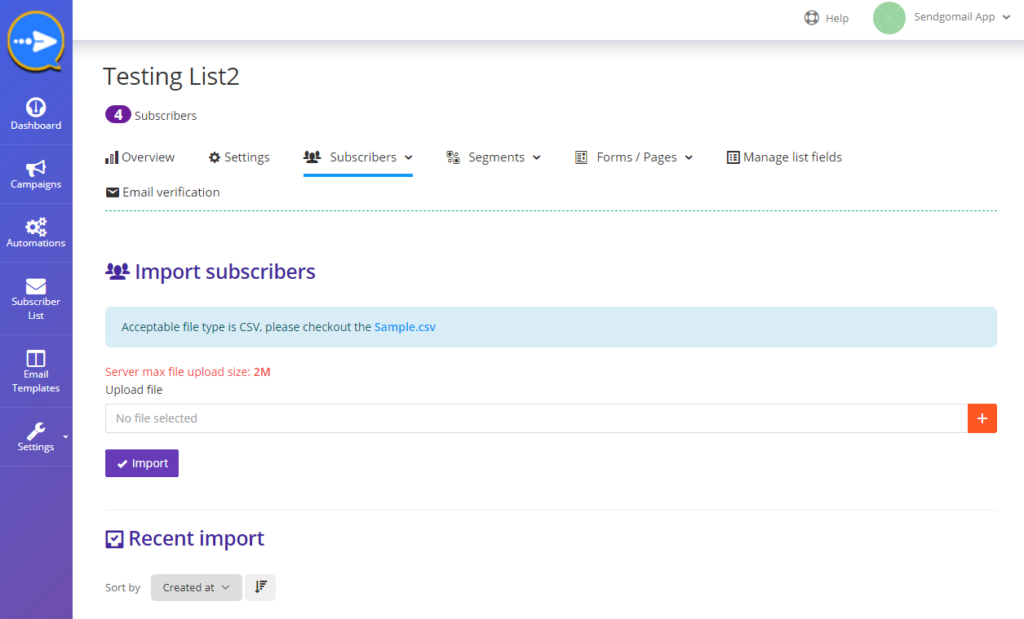
- Select “Import” option from the dropdown under “subscribers” option.
- Click on the “Plus” button to upload the CSV file.
- Once you have uploaded the particular file, just click the “IMPORT” button. For reference see the below image.
Step:2.2 – Add Emails Manually.
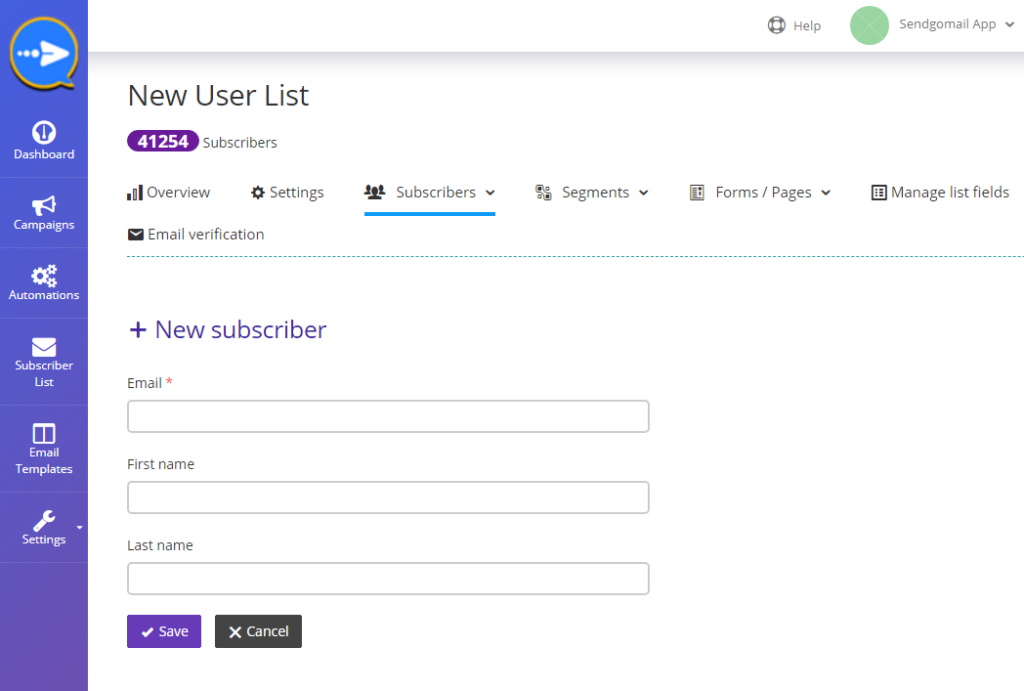
In case if you want to insert few subscribers in an existing email list or into the new list then you can manually add them as shown below-
Select “Add” from the dropdown under “subscribers” option.
You will be redirected to the New Subscriber page, where you will get a form in which you can enter the details of the subscriber.
The format of manually adding any subscriber should be – email, first name, last name.
Once you have entered all the email addresses then click “SAVE” button.
And, in order to avoid complication while importing your list.
You can also download our “Sample CSV” and cross-check the format of your CSV file with that sample list.
Now your contacts are successfully imported, and you can send emails to that list using Sendgomail.
How automation work in sendgomail -
Automatically deliver emails on pre-set schedule to engage your subscribers. Email marketing automation is a strategy that sees marketers send triggered or timed promotional emails to subscribers on their mailing list.
It enables online marketers to send out personalized messages to both prospects and customers on a schedule or when specific conditions are met. We will share step-by-step procedures to understand automation in sendgomail.
Step 1 – From your dashboard select the “Automation” option. You will be redirected to the Automation page.
Step 2 – Click on Create Automation button.
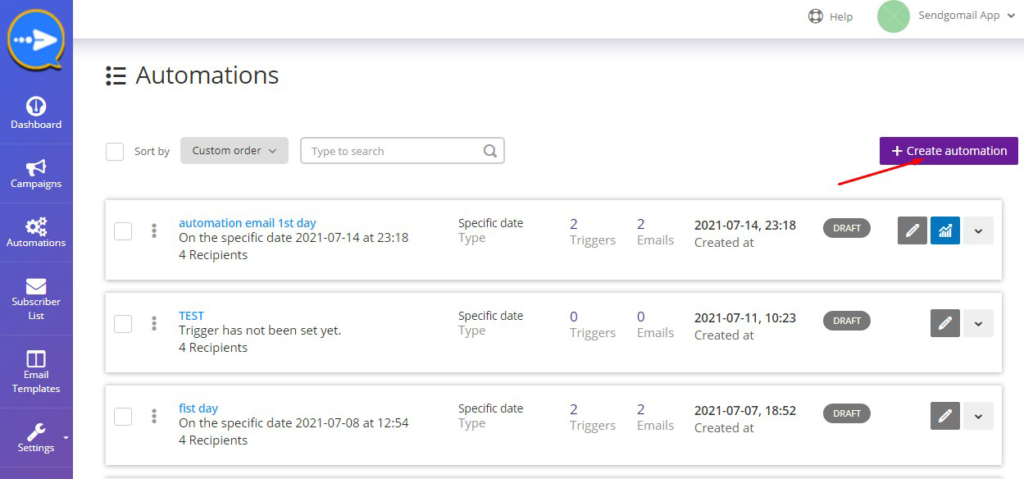
Step 3 – After clicking on Create Automation button.
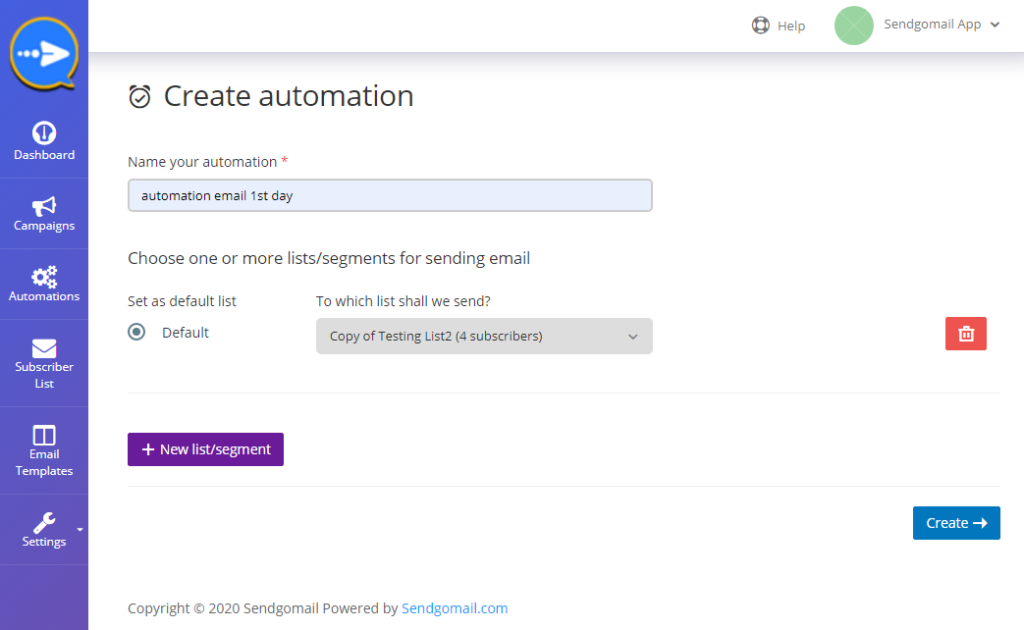
You will find a window where you have to first name your automation. and then Choose one or more lists/segments for sending email through a drop-down list. you can also add new lists/segments.and then click on create button.
Step 4 – After clicking on create button, you will see a new window where you will see various functions likes trigger, workflow, and review and confirm.
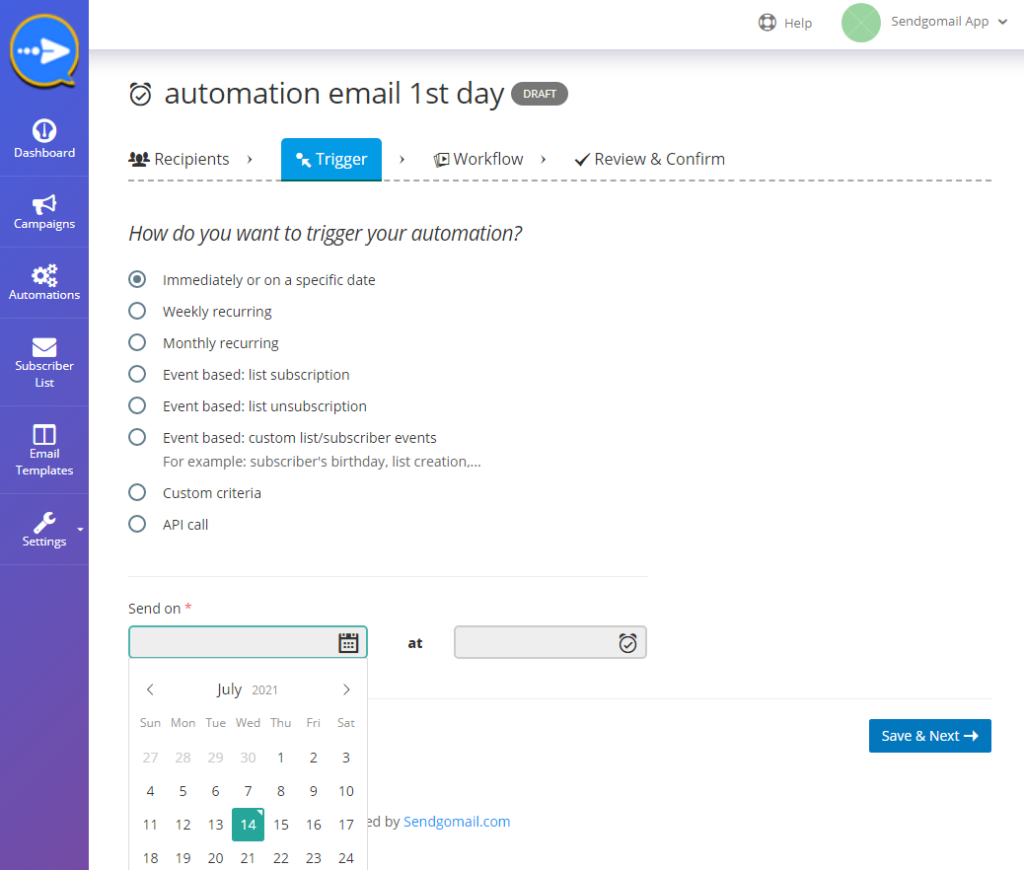
Step 5 – Trigger When you click on the trigger button, you will see How do you want to trigger your automation? where various trigger options. set your trigger option which you need to required for your automation. after that choose sending date and time for automation and then click on save and next button.
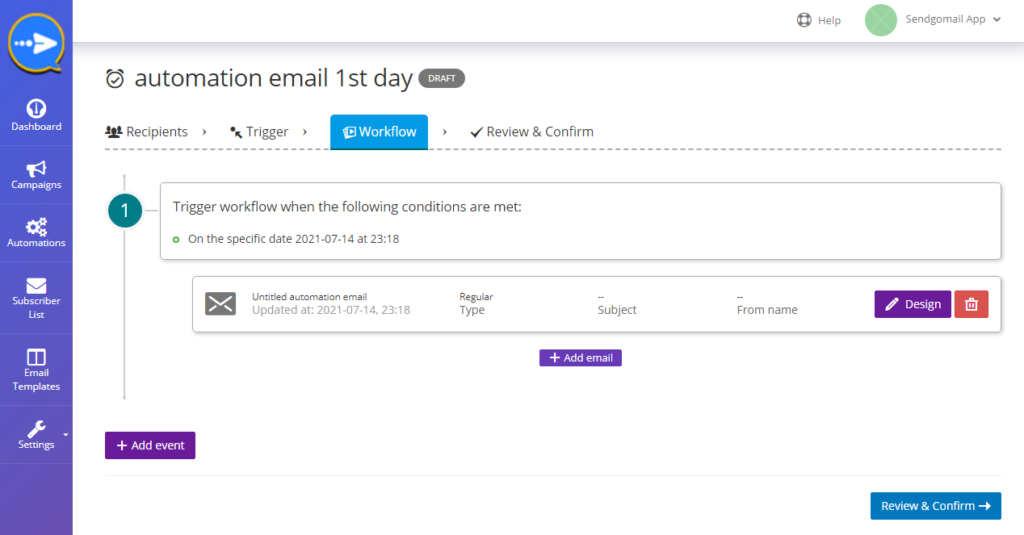
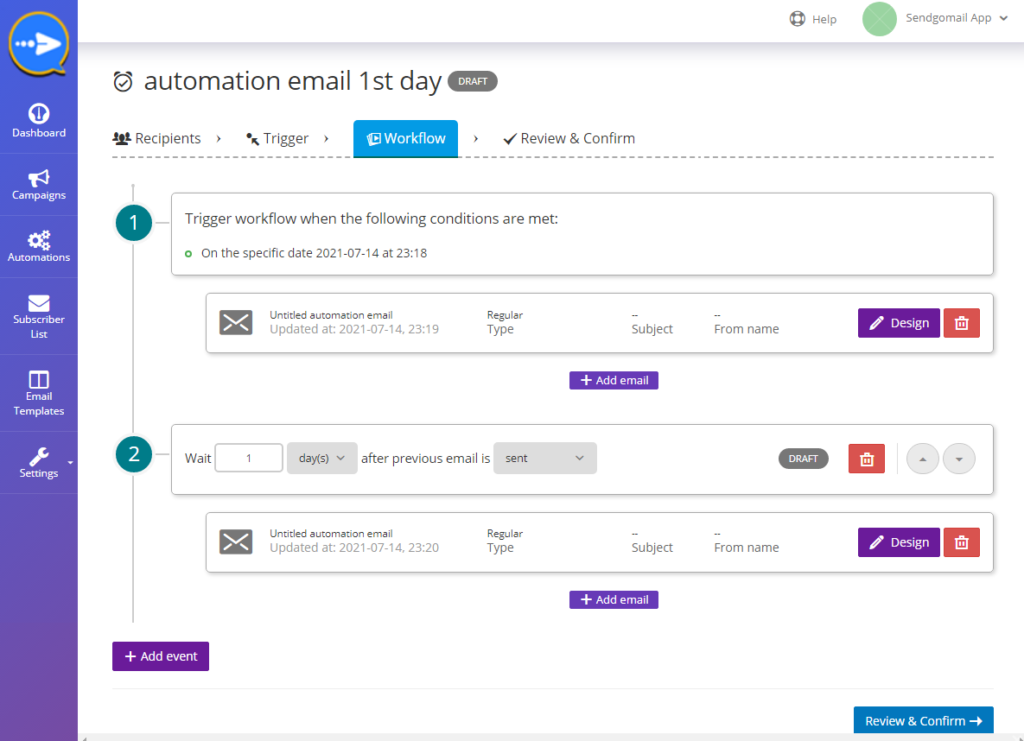
Step 6 – Workflow Trigger workflow when the following conditions are met. In the workflow, you can add your email id as well as add event and click on a review and confirm button.
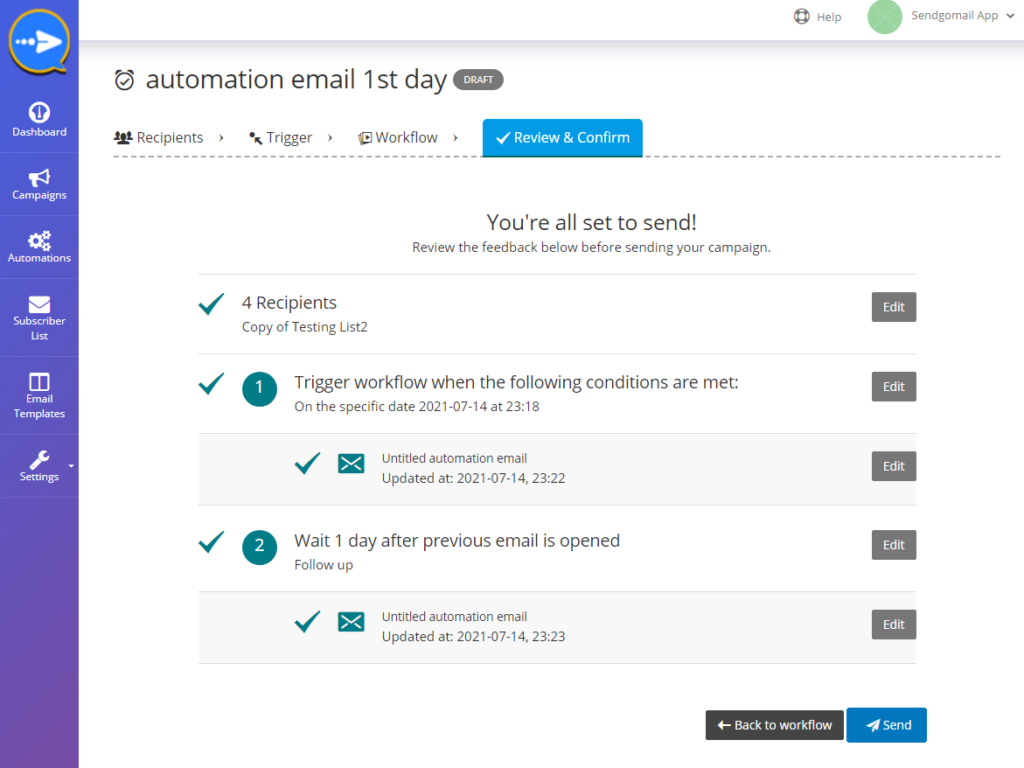
Step 7 – Review and confirm You’re all set to send your automation email.
How To Create Campaign
Sendgomail gives you lots of flexible settings and design options, as well as builder tools that will help you to compose responsive and professional email.
Here in the below steps we will walk you through every step of the process.
Things to know
- Before you can create a campaign in Sendgomail , you’ll need an audience.
- If you don’t have any contacts yet, create and share a signup form to build your audience.
Step 1- From your dashboard select “Campaign” option.
You will be redirected to campaign page.
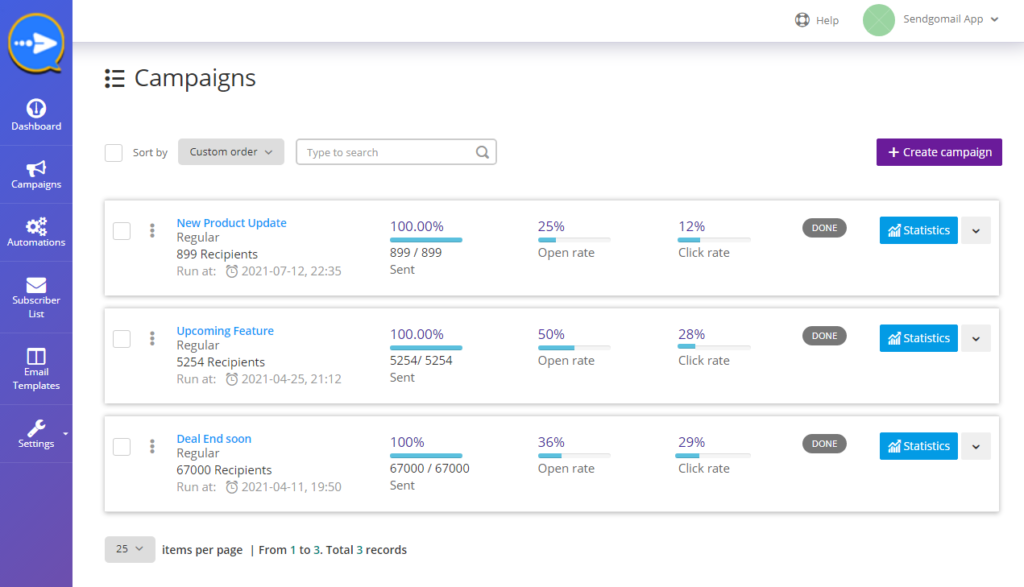
STEP 3 – After clicking on CREATE CAMPAIGN button..
You will find various steps to move forward. First one is select recipient.
STEP 4- Choose your list from the dropdown field.
You can select one or more lists/segments for sending email. Just hit the button “New List/Segment”.
Once you are done click the “Save & Next” button.
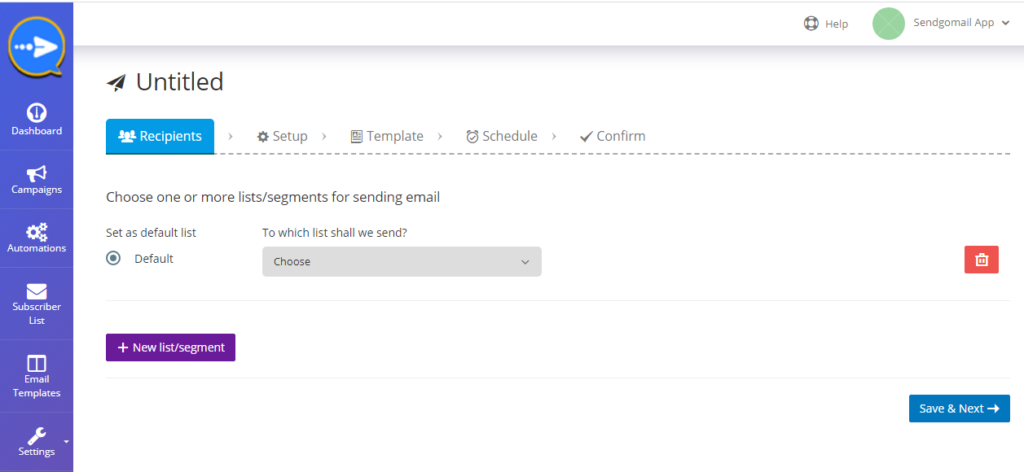
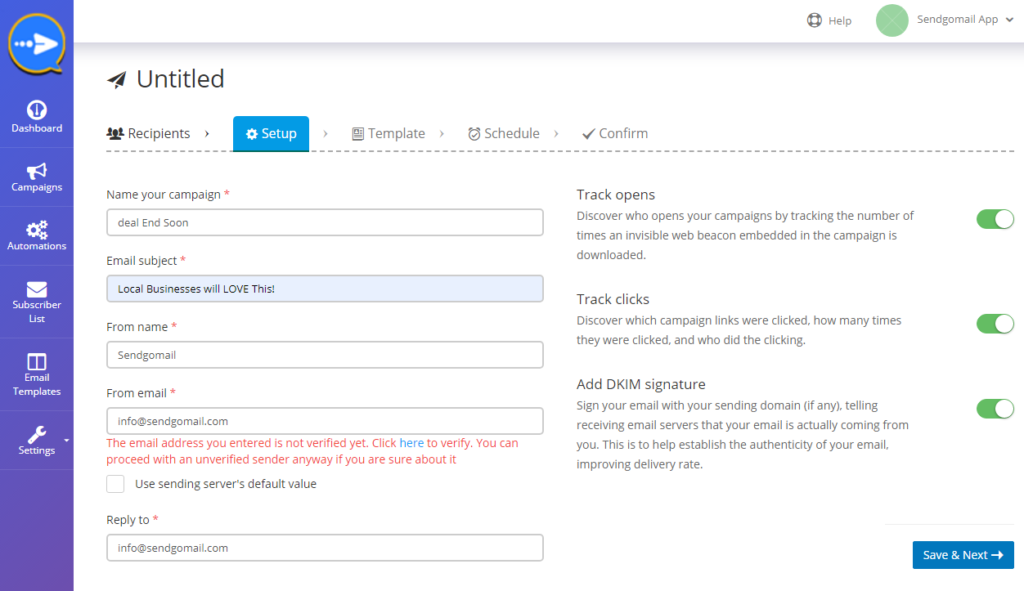
STEP 5- Now you will be redirected to Set-up options.
There you will find a small form, with default values that you have entered during list creation.
If you want you can change the details as per your requirement. Don’t forget to enter the subject line.
click the “Save & Next” button.
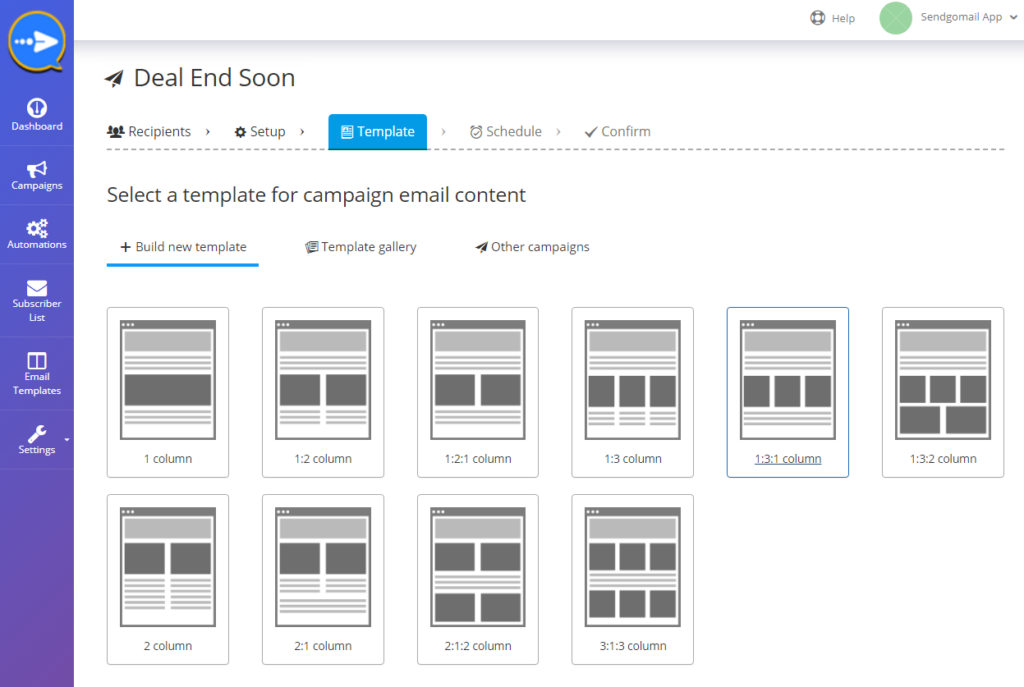
STEP 6 – As soon as you enter into the Template page.
You have to select a template for campaign email content. Below are the options you will find-
Build new template – Design and customize your content from scratch.
Template gallery – You can upload your HTML template bundle. Normally, it should be a .zip file containing.
Other campaigns- Choose from previous campaign template.
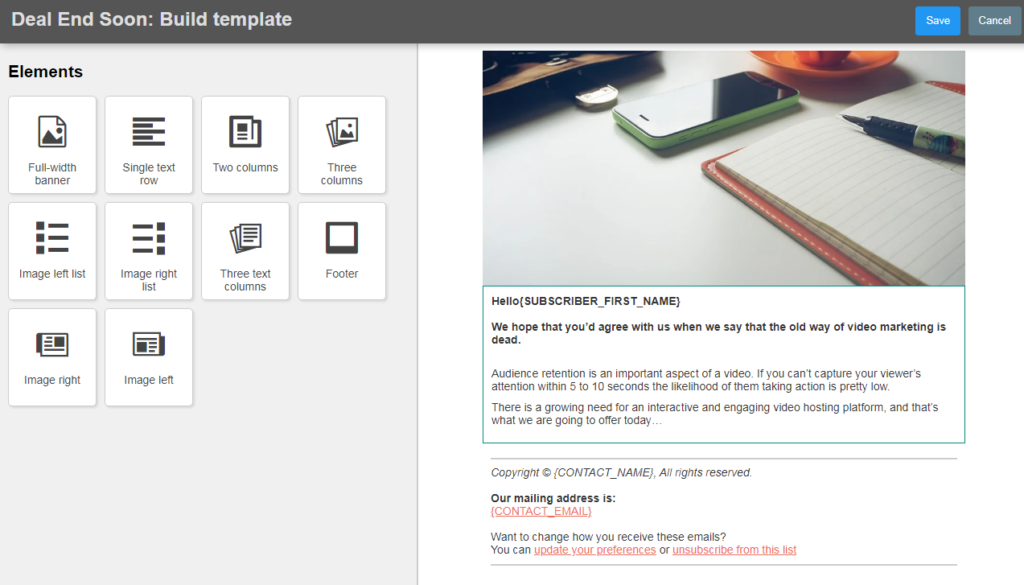
Select the “Build New Template” option and you will move on to the email builder panel.
STEP 7 – Click on sections to Add/Remove or to Drag & Drop field elements as per your requirement.
If you want to Add More Fields to your email, you have options on the left side.
Choose and insert what you want and where you want.
Once you are done, click on the Save…
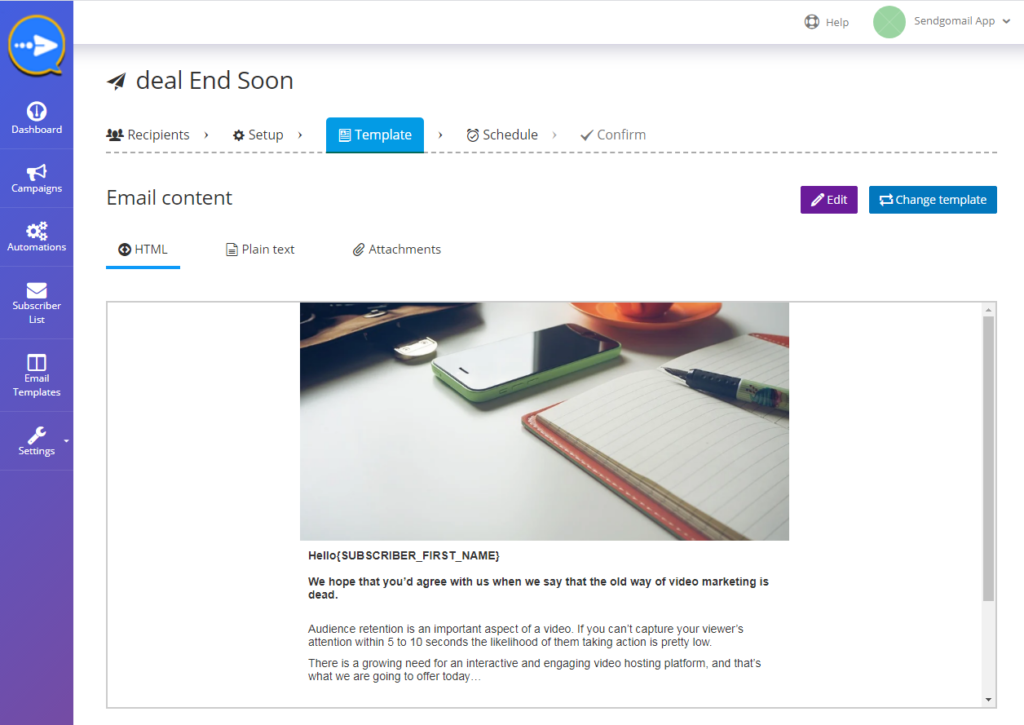
STEP 8 – Then you will proceed towards the editor panel.
Along with HTML editor Sendgomail also provides Plain Text Editor from all the email editors and clicks on it.
This is the most Fundamental Editor one where you can create email within seconds.
You just need to write your content in the space provided.
Finally, click on NEXT.
And now you will proceed towards the Schedule option.
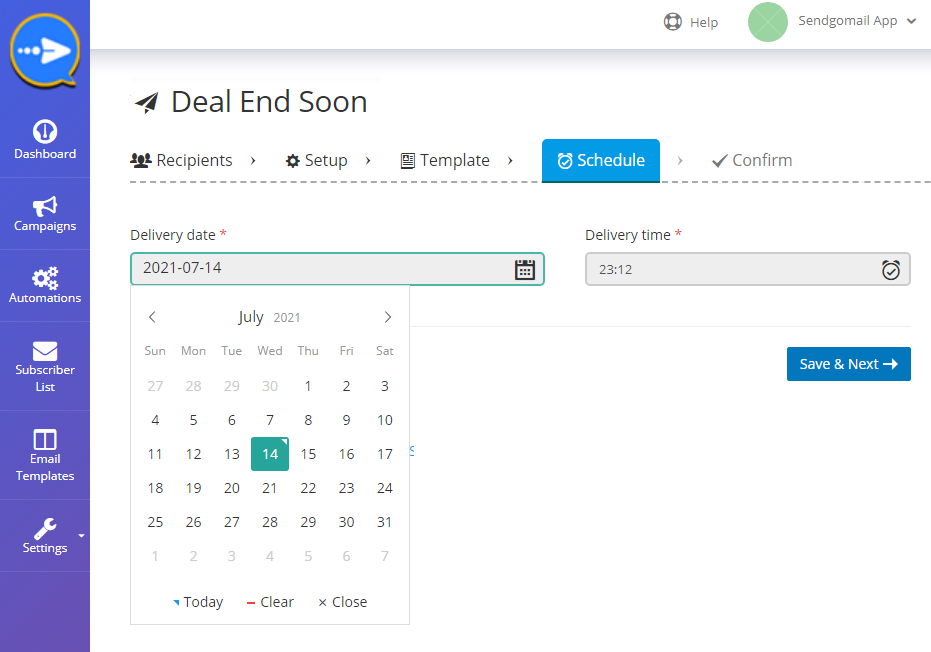
STEP 9 – Create and schedule your emails to send later and reach out to your customers at the right time by using scheduling features.
Now you have to set a date and time for your campaign.
Pick your date and time for the campaign to send it when you want to and click on the SAVE & NEXT button to send the campaign later.
Scheduling feature in Sendgomail allows you to set time and day to send emails automatically at the right time.
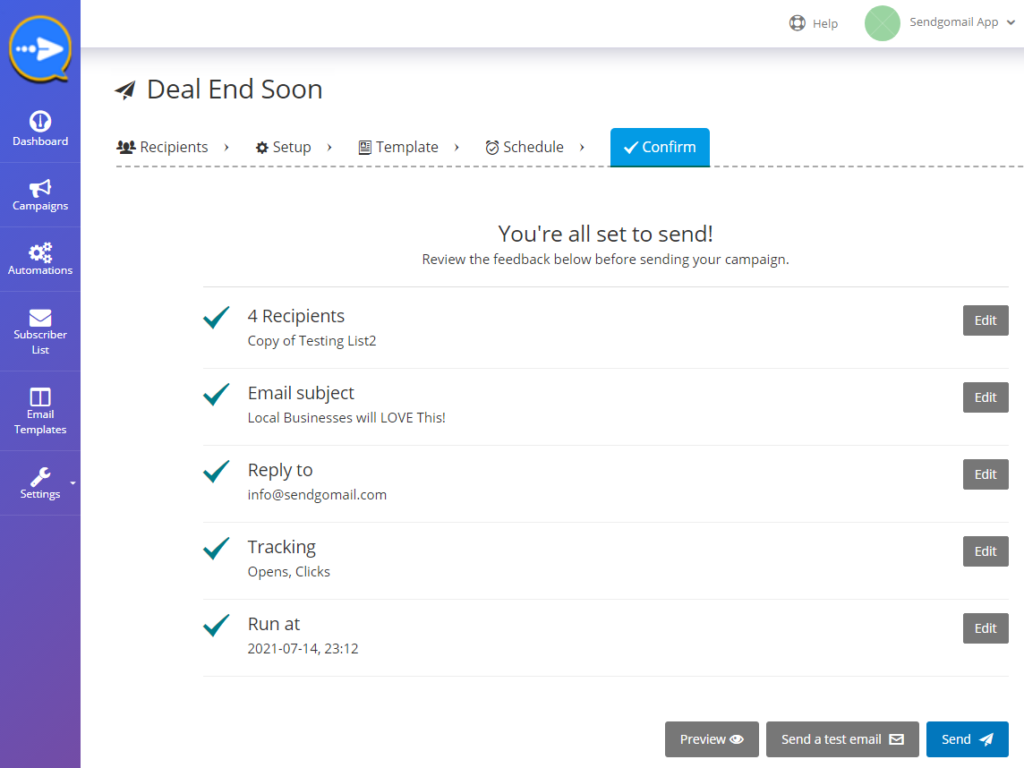
STEP 10 – After clicking on Save and Next button you will see a confirmation page on your screen.
Now your campaign has been successfully scheduled.!
You can also EDIT, DELETE and TRACK scheduled campaigns.
Edit your Profile -
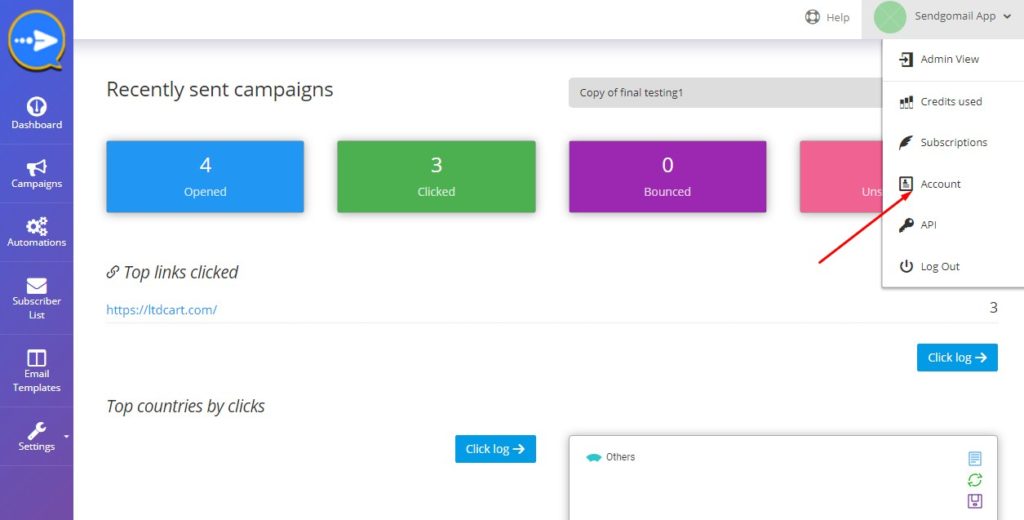
Step: 1 – You can edit/ change your profile settings by simply click on the account button on the upper side of the right corner as shown below images.
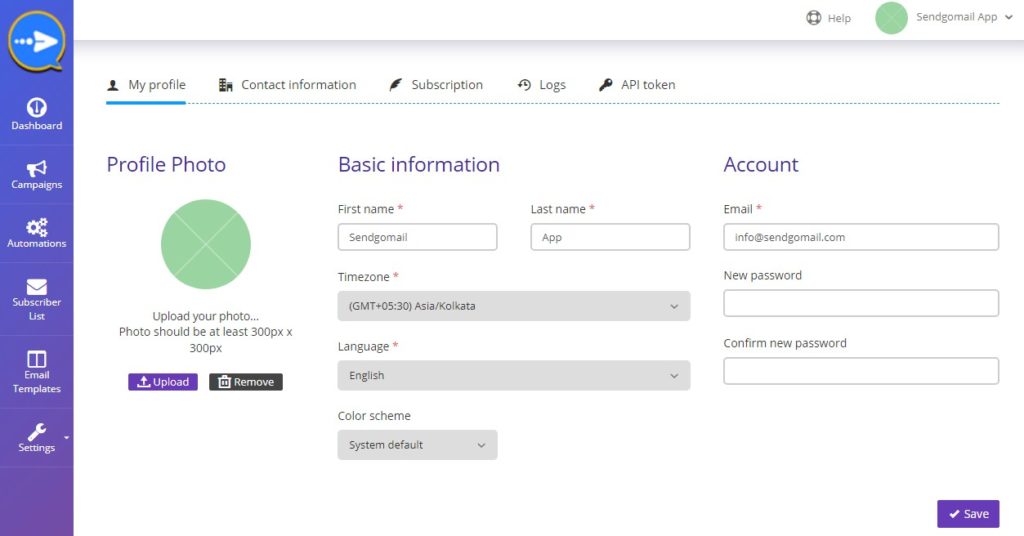
Step: 2 – Now you will see a new window, where you can upload your profile photo, add your name, add your email id and all basic information and you can also set your new password in it.
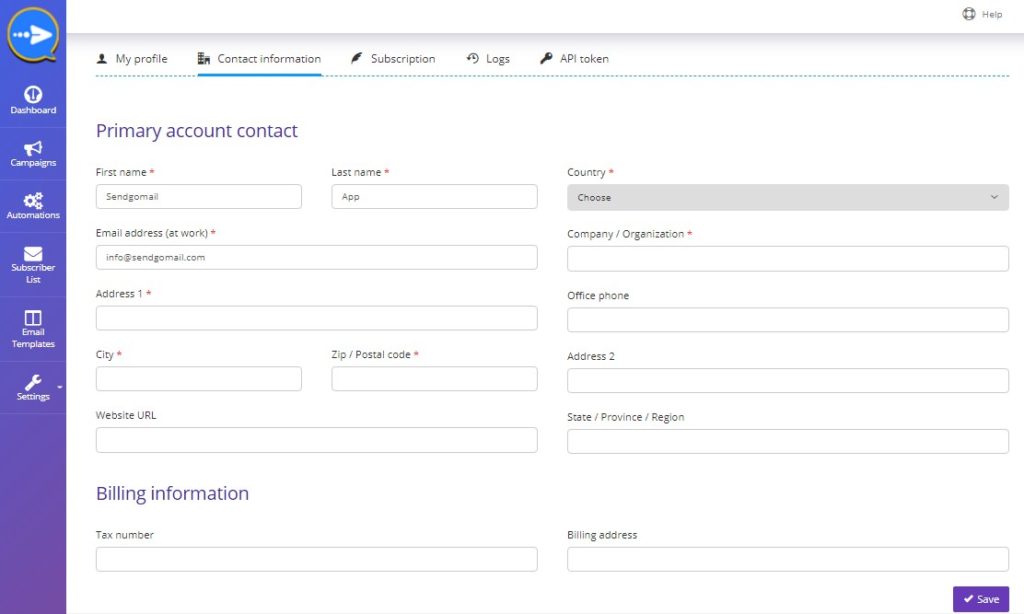
Step: 3 – After that when you click on contact information, you will see personal account contact and billing information. which you can edit or changes as per your needs.
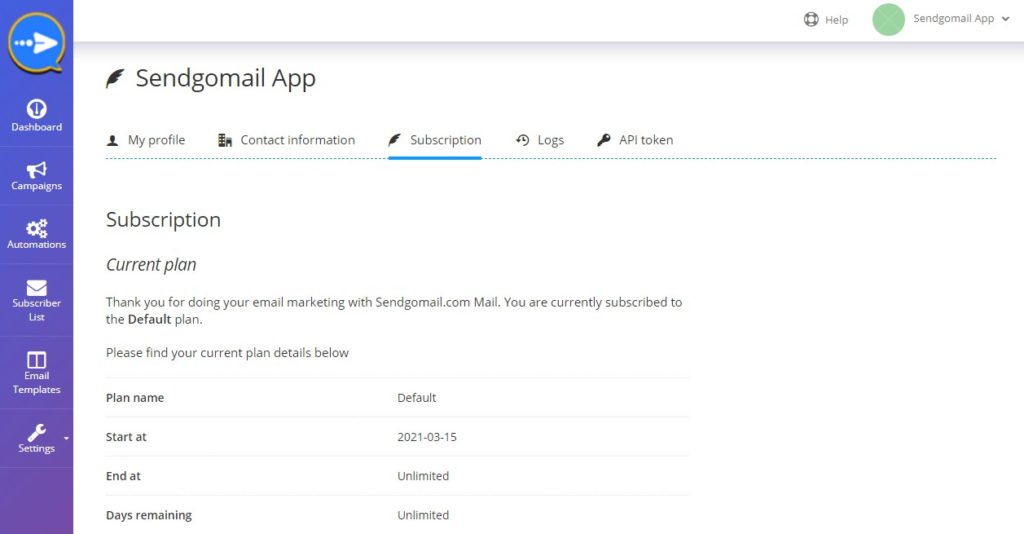
Step: 4 – Subscription:- By clicking on the subscription button, you will see your subscription, plan name, plan start days, remaining days, and many more details.
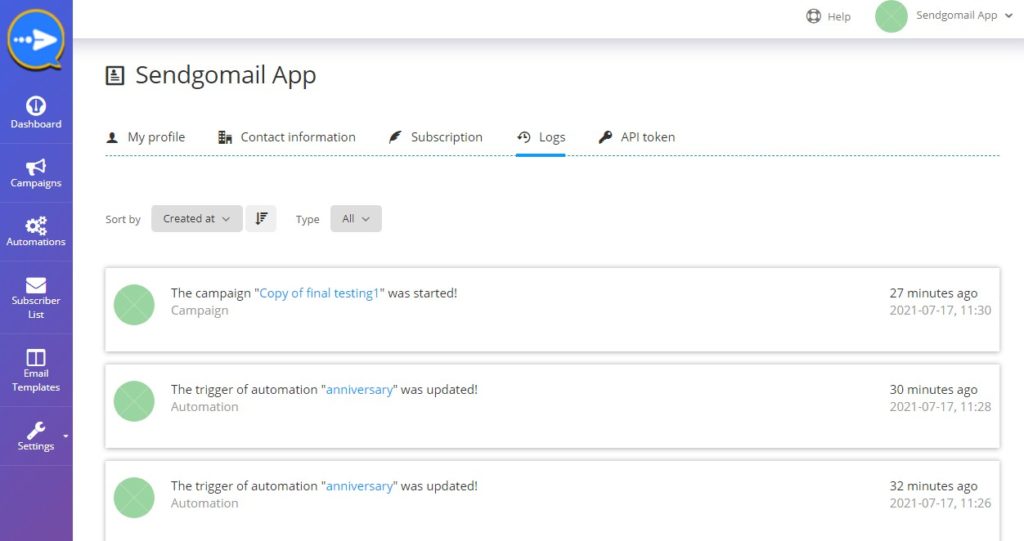
Step: 5 – Logs:- When you click on logs, you will see all your logs details along with all your activities.
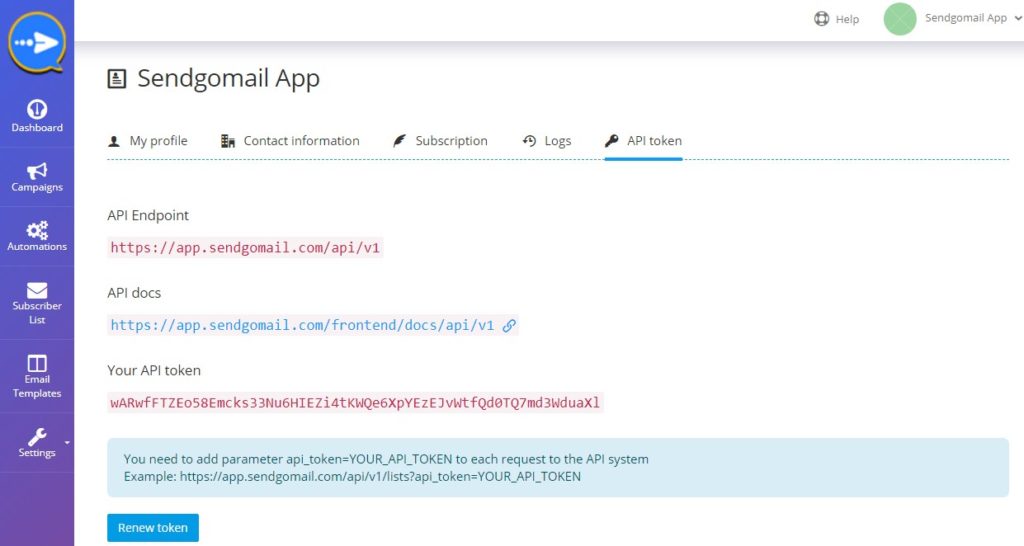
Step: 6 – API Token:- You can see here API Token information. and you can renew your token.
Sending identity -
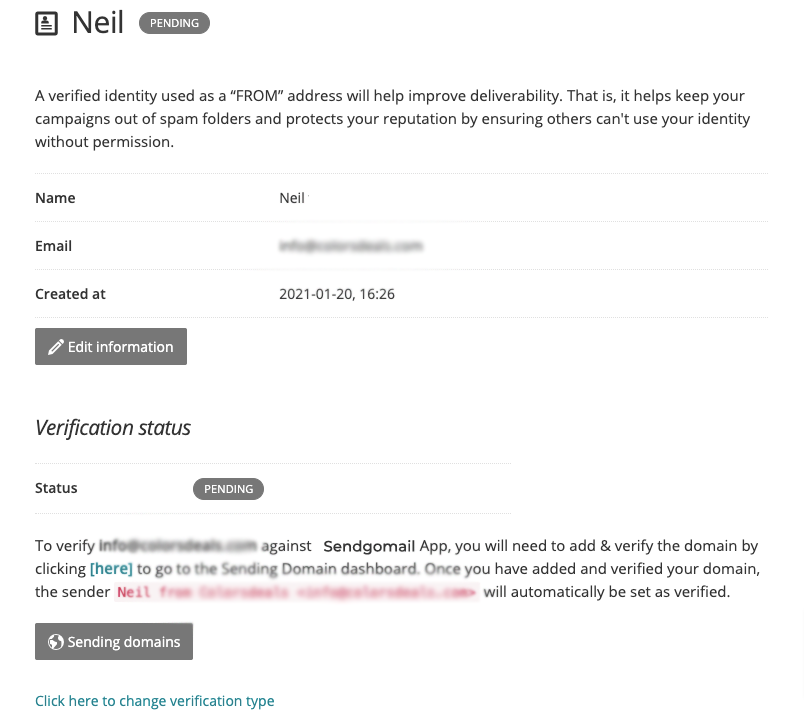
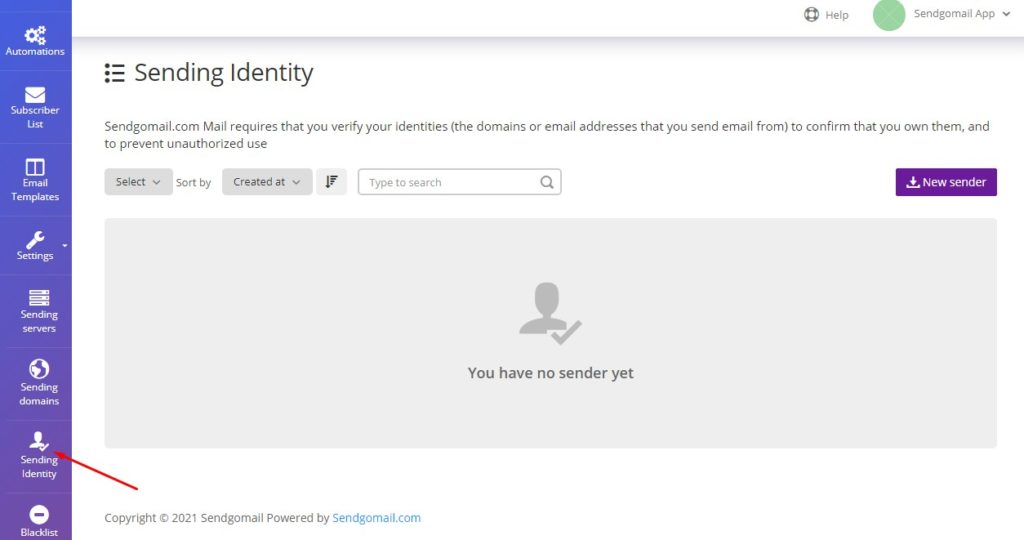
Sendgomail requires that you verify your identities (the domains or email addresses that you send email from) to confirm that you own them, and to prevent unauthorized use.
Step: 1 – Click on the Settings button and go to sending identity tab through a drop-down tab. as shown below screenshot.
Step: 2 – You will see here sender identity or sender information likes his domain and email addresses.
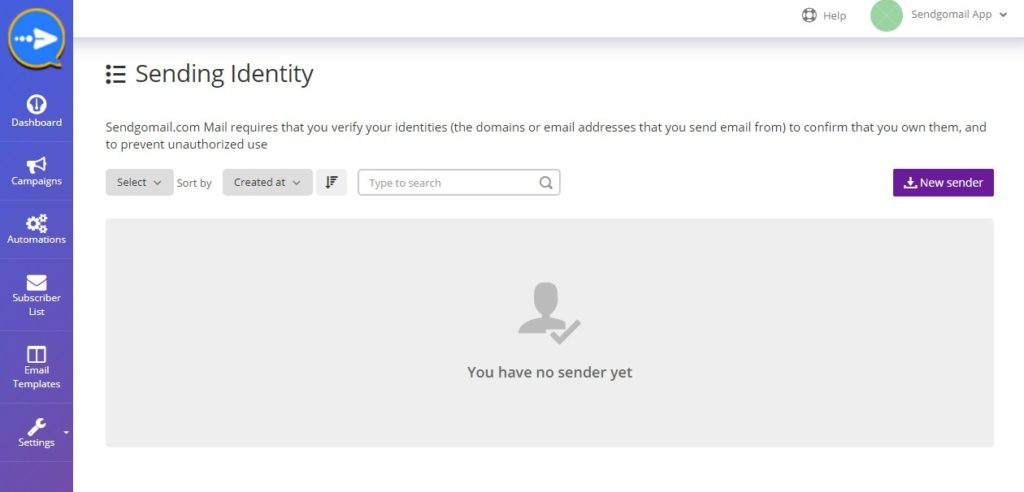
Step: 3 – When you click on the new sender button, You can create a new sender.

How Domain settings work -
Sending domain is used to verify the sender whose email address appearing in the FROM header of an email. Add your verified sending domains to send emails on your or your organization’s behalf.
Step: 1 – Click on the Settings button and go to sending domain tab through the drop-down tab. as shown below screenshot.
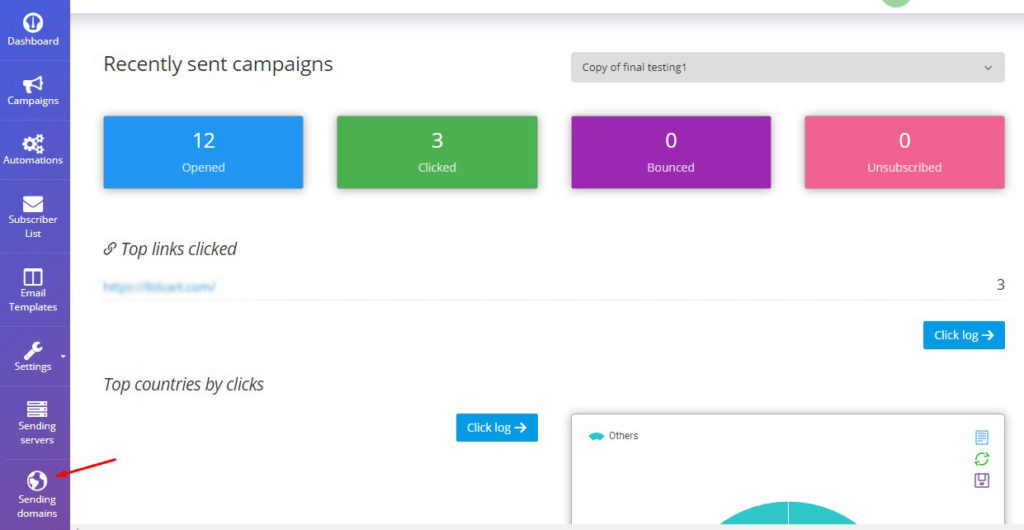
Step: 2 – You will see here sender domain or domain information.
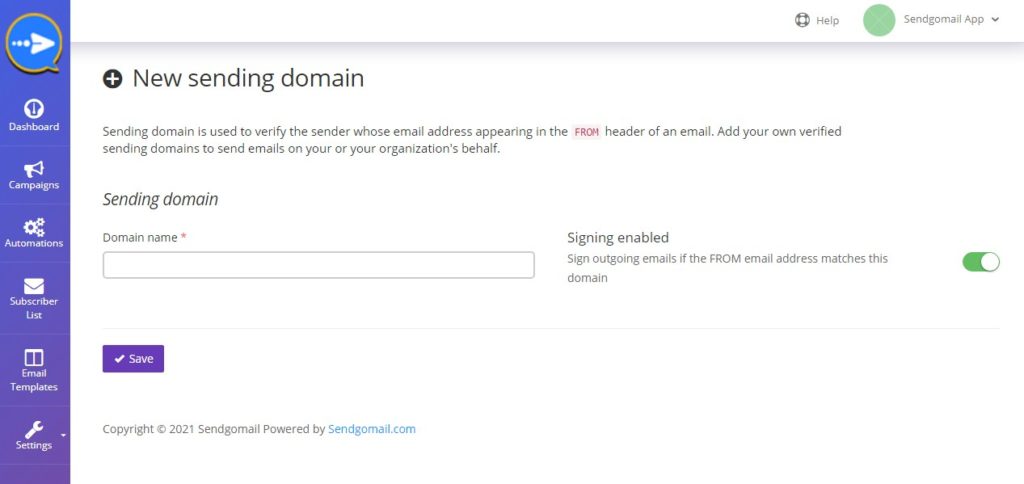
Step: 3 – When you click on the new sending domains button, You can create New sending domain.

